|
The idea that innovation is necessary was cemented for me this past spring. We, as teachers had to be flexible and adapt. This is definitely a strength of educators, but the situation was unexpected and to some degrees we weren't prepared. To prepare our students for an unknown future, innovation is crucial.
How are we going to help our students continue to move forward, regardless of the format of "school"? 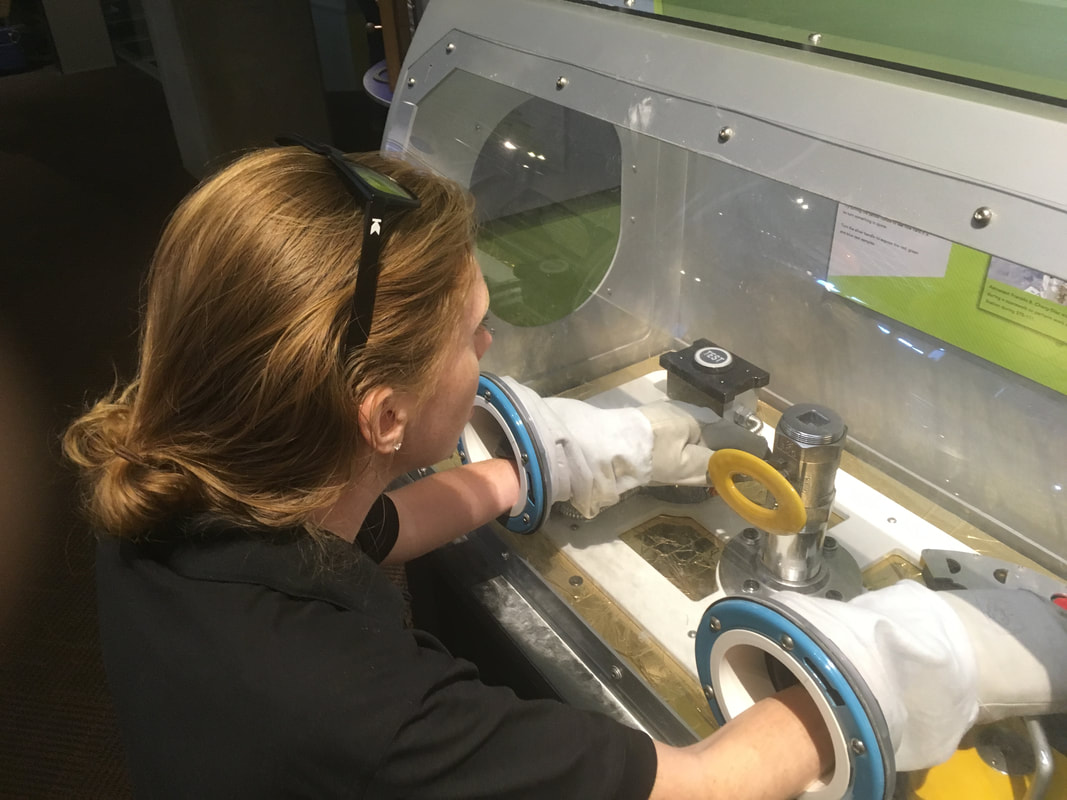
Design challenges may be my favorite thing to create and teach! I love being able to have students more meaningfully connect with content in a hands on way. Their creativity continues to blows me away. Providing them with the structure (criteria and constraints) allows me to facilitate and students to be in the driver's seat. It gives them choice in how to show their learning. It also makes it a more memorable and fun experience. Provide students with criteria and constructs and a design challenge can be a quick 5 minute activity, class period performance assessment or even an entire unit.
If you're wanting to start small, introduce this to your kiddos or get your feet wet, try the Challenge Generator. You can choose between a STEM Education or Design focus. There are three categories; Inventions, Build & Engineer or Create & Draw.
If you're a regular reader, the following may seem familiar. I've talked about these resources in previous blog posts. Science Learning thru Engineering Design (SLED) process before. There are many design challenges that target K - 6 science concepts and include books to read to support learning. I model all of the design challenges after this model as I have found it to be the best structure for design challenges in the classroom. ENGR Teams is another great one. It is targeted to 4th - 8th grades. Both were developed at Purdue University with NSF grants and can be adapted to better fit your standards and learners' needs.
If you're looking for additional tools or resources to promote design thinking in your classroom, try The LAUNCH Cycle and Innovators Compass. The best thing about both of these tools is their adaptability. The LAUNCH Cycle is an acronym so each letter represents a phase, so it's easier to remember. There is also a corresponding symbol for each phase to help visual learners. The last phase, LAUNCH to an Audience, is a great way to incorporate a speaking and listening component for presentations. It is detailed in the book, Launch: Using the Design Thinking Process to Boost Creativity and Bring Out the Maker in Every Student by: AJ Juliani & John Spencer. Not to mention, the book cover is a rocket! Check out the free printable resources.
The Innovators Compass is a great tool for students to look at a problem from many different viewpoints. The variety of graphic organizers allow for easy differentiation and scaffolding.
PBS Design Squad partnered with NASA to create Space Exploration themed design challenges too!
Below, I've put together a small list of design challenges mostly targeted around space exploration. Some are competitive during in the summer, while others extend or don't have deadlines. Regardless, you can incorporate these into your classroom.
Next Moon STep
This design challenge is brought to you by Future Engineers, the same group that led the Name the Rover contest.
K-12 students are tasked with creating an original "image of your footprint (photo or artwork) and tell us what you would say, in 20 words or less, if you were the next person to step foot on the Moon." Submission Deadline = July 21st @ 11:59 Eastern time Reinvent the Rover Wheel
Future Engineers are preparing for the upcoming launch of the Perseverance Rover to Mars with this challenge.
Submission Deadline = July 26th @ 11:59 PST Nasa's Lunar Loo Challenge
This one is more geared for older students (high school and college). As we look toward the future, astronauts "will need a toilet that has all the same capabilities as ones here on Earth. Therefore, NASA is calling on the global community for their novel design concepts for compact toilets that can operate in both microgravity AND lunar gravity. These designs may be adapted for use in the Artemis lunar landers that take us back to the Moon. Although space toilets already exist and are in use (at the International Space Station, for example), they are designed for microgravity only. NASA’s Human Landing System Program is looking for a next-generation device that is smaller, more efficient, and capable of working in both microgravity and lunar gravity. This challenge includes a Technical category and Junior category."
Submission Deadline = August 25th Home on the Moon
This interactive project led by the Aldrin Family Foundation is a great way to get your students, your family, friends or coworkers thinking about the future of space exploration . Create a team, choose the best location for a moon outpost and submit proposals informing and defending your choices.
For additional information, resources and registration, click on the link below. Nasa Spotlite
NASA Spotlites are short (90 - 120 seconds) videos created by students to help debunk scientific misconceptions. So, NASA needs you to create videos to be a part of their eClips website.
"One of NASA’s goals is to improve scientific literacy, or our understanding of science. The goal of the video is to engage students in doing activities that can help change their misconceptions about a topic in science." Find more information; including necessary components of your video, things to research, tips and rubric. Be sure to register your team by clicking on the button below. Design Your Habitat
Activities from the SciArt exchange. Each week focuses on a related topic and flows through Think, Create, and Experience phases including videos from awesome guest speakers.
Bonus
This is a design challenge that I created for students while they were doing eLearning. The great thing about this is that you can adapt it to fit your classroom; students and content area. It can be done in person, but it can also be assigned virtually.
I hope that you'll consider how to incorporate design challenges into your classroom. Check out the Resources Tab to help support you in this Endeavor :) It truly is a game changer and helps students develop those "soft" skills like collaboration, problem solving, critical thinking, deadlines, etc that will help them be successful in your classroom and beyond!
Peace, love and space exploration, CAPCOM Conrad
0 Comments
The Golden Record has a collection of songs, sounds, greetings and images of Earth. So, each student chose a song, sound, greeting and picture to represent them. They put all of this information on a website that they created. Next year, we’re thinking it would be a good fit at the beginning of the year. It allows you to learn more about your students, so it would be an awesome getting to know you activity. It is also a great way to embed digital skills with content, especially since our 6th grade students are going 1:1 with Chromebooks next year. Students used Google Suite products (Google Classroom, Google Slides, Google Drive, Google Docs and Google Sites) to share their information. If your school doesn’t use Google products, there are other ways, but Google is the most user friendly. We used the Science Learning through Engineering Design (SLED) structure, mentioned in previous blog posts. The great thing about the SLED structure is that it has both an individual component and team component, so students get to share their voice, but also need to learn how to collaborate with others for a successful product. It’s not just a science project. It also involves language arts, social studies, technology and engineering standards. It is a very student-driven project. We were guides and facilitators. We would begin each day with a recap of what we’d done the previous day and what student tasks needed to be completed. Mission ObjectivesHere are the objectives that students were working on achieving by the end of the project. Content and language objectives are part of the SIOP Model, which is to help educators meet the needs of English Language Learners. I've also found that it's a great way to begin a lesson and allows for consistency. I have different students read the objectives. When planning a lesson, it helps me pinpoint what exactly I want the kiddos to do. I think it also helps the kiddos be in the know. For big projects, I write a set of objectives that I want the students to meet by the end of the project. I don't write separate ones each day. Content Objectives: (What are we going to learn about?)
Day 1> Design brief - Paragraph summary of background information related to the challenge. After students read the design brief, they are able to identify the following elements listed below. > Identification - Problem, Goal, Client, End-user, Criteria, Constraints > Individual Design Chart - 3 potential options for each category (song, sound, picture and greeting) and reason for each option. If you run out of class time for students to work on this, it would be a good homework assignment. It's all about them and their opinions, so it's not something that they need explanation or much support. Day 2> Finish Individual Chart, if needed > Team Brainstorm - The focus was on sharing ALL of their options for ONLY one of the four categories (image, song, sound OR greeting) from their Individual Chart. We told students to choose a category that they were having a hard time narrowing down to one option and would benefit from feedback. Each student had uninterrupted time to share their options from their chosen category. This was followed by warm and cool feedback statements from group members. > Create Google Site -> Each lab group created one Google Site. Each group member got one page on the group site. Students had to create a descriptive title. Add ALL group members as collaborators. Add one page/student in the group. Day 3> Work Time - Individual Design Tasks Students worked through a checklist and had specific components for each category (picture, song, sound and greeting). Students were able to view Screencastify video demonstrations to help them with these tasks, if needed. Day 4> Work Time - Individual Design Tasks continued Day 5The Documentary is available to purchase on the PBS website or you can watch it on Netflix, Amazon or iTunes. We did not have time to watch the documentary, but it is a great resource. It is ~97 minutes long. **Depending on the age of your students, be aware that there are images of the human body and reproductive system at minute 9 and minute . It would be good to watch before the unit, during the unit (15 mins/day) or afterwards as a wrap-up activity. > Reflection - Journal Entry Questions > Web Design Reveal - Students had their website pages up on their Chromebook screens. Students rotated to another group member's seat and reviewed their website page. They were able to listen to the song chosen. Students shared warm and cool feedback on post-its. Warm and cool feedback is something we'd working on before. Warm feedback is a statement that starts with I like how... and provides positive observations of the work . Cool feedback is a statement that starts with I wonder if... and provide ideas for improvement. 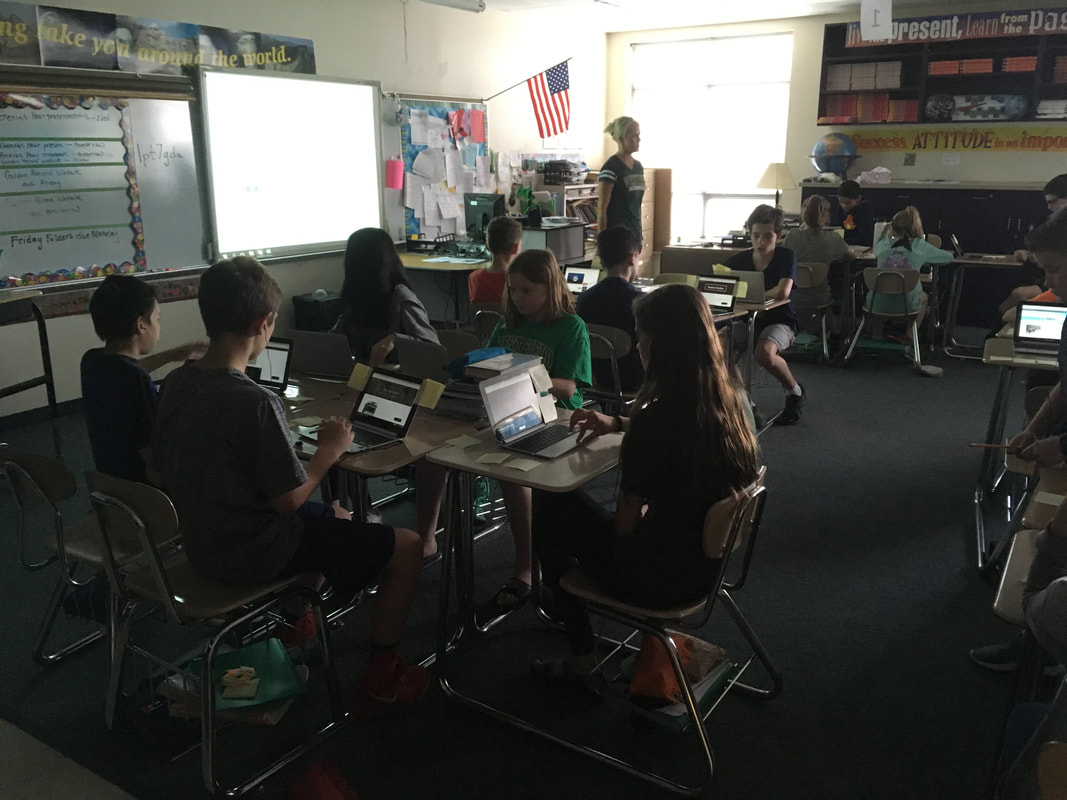 Web Reveal in Action 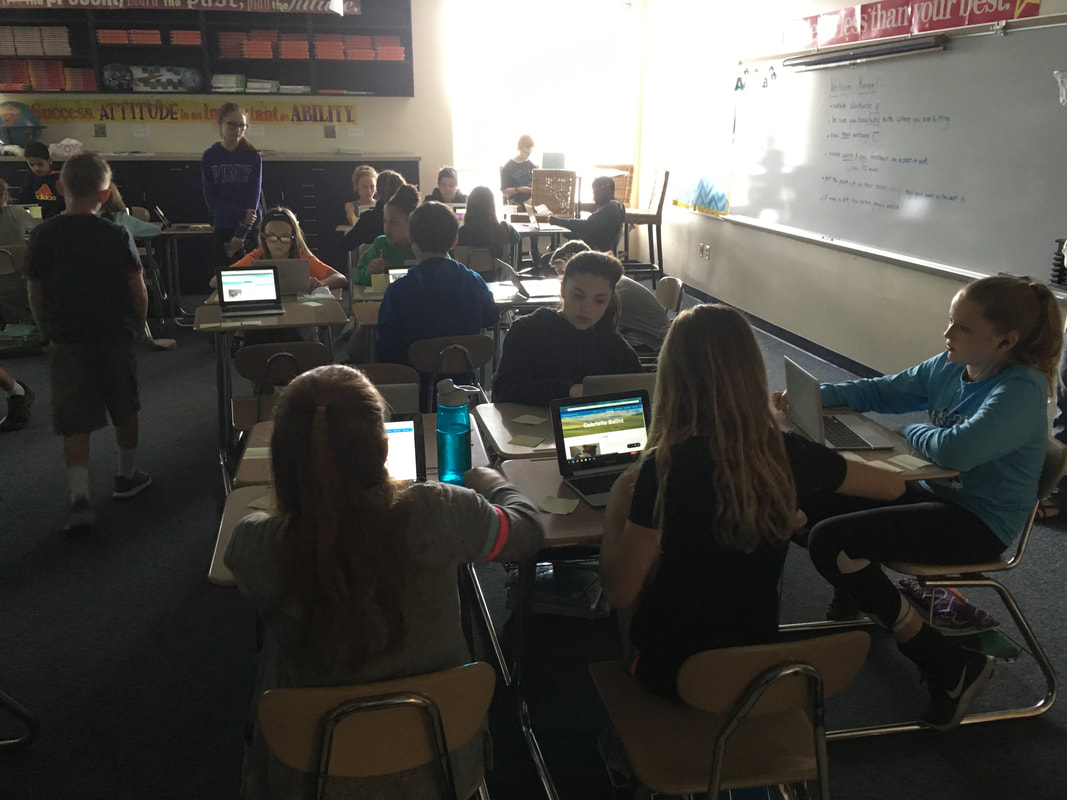 Students evaluating websites and providing warm and cool feedback. The best part of the project was reading student reflection after the project. Students answered questions in a Google Form. Some questions were rating scales, but we got the most information from were the open ended questions. I was so impressed with the thought and consideration that they put into their answers: - Before this design challenge I... - After this design challenge I... - How would you describe this project/what you learned/were able to do? Here are some student statements to answer the last question. "This project was definitely one of my favorites this year. I loved how you got to mix your personal life with a awesome space project. I learned how to use google sites, and I learned space and many other things can tie to you in many ways." The logbook, video demonstration links and The Farthest- Voyager in Space Documentary questions will be added to my TPT store.
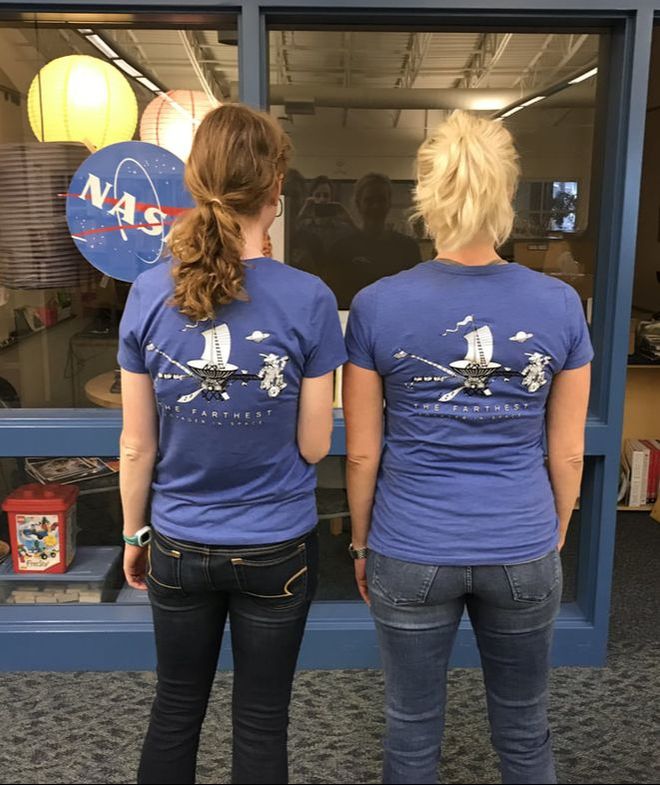
Peace, love and space exploration, - CAPCOM Conrad I have learned a tremendous amount throughout this past week with the Voyager Design Challenge, as I know the JPL scientists have been learning from the Voyager Spacecrafts themselves. The digital tools and skills are a work in progress, as the development of the Voyagers were. Despite the lack of familiarity or experience with the digital requirements students have been asked to complete, they have problem solved and persevered to create their own time capsule and piece of a golden record. Helpful ResourcesThis is a great one-stop for all Voyager information from NASA JPL (Jet Propulsion Laboratory) , home of the Voyager missions. 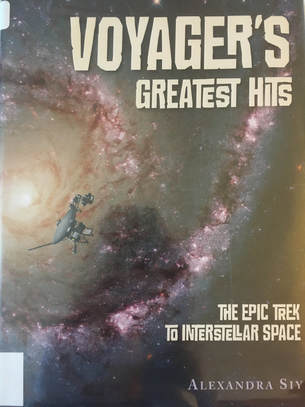 When searching for books about the Voyager, there aren't many, especially for kids. I found this at the library and after reading it, decided to purchase it. A great PBS documentary available to purchase or watch on Netflix, Amazon Prime or iTunes. I am thankful to have received a copy of this on DVD at Space Center Houston's Space Exploration Educator's Conference (SEEC) in February. I'm working on creating discussion questions that you could use in your classroom. key things to a successful voyage1. Co-teaching It’s true what they say about two heads being better than one!Being able to brainstorm, problem solve and learn along the way made this the best experience it could be for the kiddos - and us, teachers. I’m not saying that we didn’t experience challenges, but we were able to tackle them. Collaboration is key. It also helps having another teacher to be able to answer student questions and work with them one-on-one.
2. Set the stage Kiddos are curious when things change. This curiosity gets them to ask questions and be engaged in the project as soon as they walk in. They get excited about artifacts, books, posters and attire. The posters were printed and set up so students could see them as they walked in and grabbed their logbooks. On Friday, Paul brought in his equipment and helped set this up. Jaime and I cheered when we were able to hear the UN Secretary General speaking. The kiddos walked in and immediately walked over. Some knew that it was a record player. Others had no idea. They thought it was cool that we had the Golden Records playing. They even started dancing to a Bach Concerto! It definitely made my day :)  I was ecstatic to find a Golden Record set from Light in the Attic Records. The set came with 3 LPs, a booklet with all of the images, list of sounds and song sand the greetings in 55 languages - translated in English. 3. Structure We planned the project to use the SLED structure that students are already familiar with to guide them through the process. This simple structure allows students to dig deeper, search for information and promotes design thinking. Students also have to evaluate and defend their ideas. The Innovator’s Compass and LAUNCH Cycle were also a part of the structure. As student’s completed tasks, they were moving through the LAUNCH Cycle phases. The last phase is to LAUNCH to an Audience, which students do through their creation of a website. The Innovator’s Compass was a helpful tool for students during the Navigate Ideas phase. We started each day with a video clip related to the mission. We made an example of the final product for students to refer to, as needed. 4. Flexibility Since students are in the midst of standardized testing, classes were shorter than normal. This is one of the things we had to be flexible about because the kiddos needed time to create. The unit had overall objectives that students were working towards by the end of the project. After realizing that the students needed more help with completing the specific design tasks, we created how-to video demonstrations to provide a reference. We decided to extend the unit by a couple days so that students had more work time to finish the requirements. The kiddos have been excited to learn about the Voyager missions and more specifically, the Golden Record. My next post will be more specific on each day of the unit, as students are still working on it now! I hope you’re intrigued and find the resources and reflection helpful. I’ve had a blast co-teaching and seeing the kiddos’ enthusiasm. Oh, the power of space exploration education! Peace, love and space exploration
-CAPCOM Conrad Probably not, but with the crazy weather Indiana has been having, you can sled on Earth in April! Last summer I attended the Science Learning through Engineering Design (SLED) Summer Institute. SLED is a Purdue University program funded by an NSF Math Science Partnership and is a true collaboration among several schools and departments. It was a great hands-on experience and I took a lot from it; including how to set-up and use a notebook, vocabulary and the overall SLED structure. SLED is targeted for 3rd-6th grade students, but I definitely think it can be used in other grade levels. SLED has curriculum available for many different science and engineering standards. The curriculum available is great, but what I find the most value in, is the structure and questioning. The structure is simple, yet powerful. The best part is how meaningful and interactive it is for the students. I've been able to see this firsthand. The collaboration and conversations students have with each other is awesome!! SLED allows each student to be individually involved in their learning while also working with their peers. Students have to make choices and defend their decisions. The structure and terminology remains consistent regardless of content or standards being covered. I have been able to co-plan 2 units with my awesome coworker Jaime using the SLED structure and incorporate space exploration! The first unit was Lunar Landers about a month ago and the second unit is next week. It's all about the Voyager Spacecraft and the Golden Record! Stay tuned for updates on that. We're really excited about it!! Lunar Lander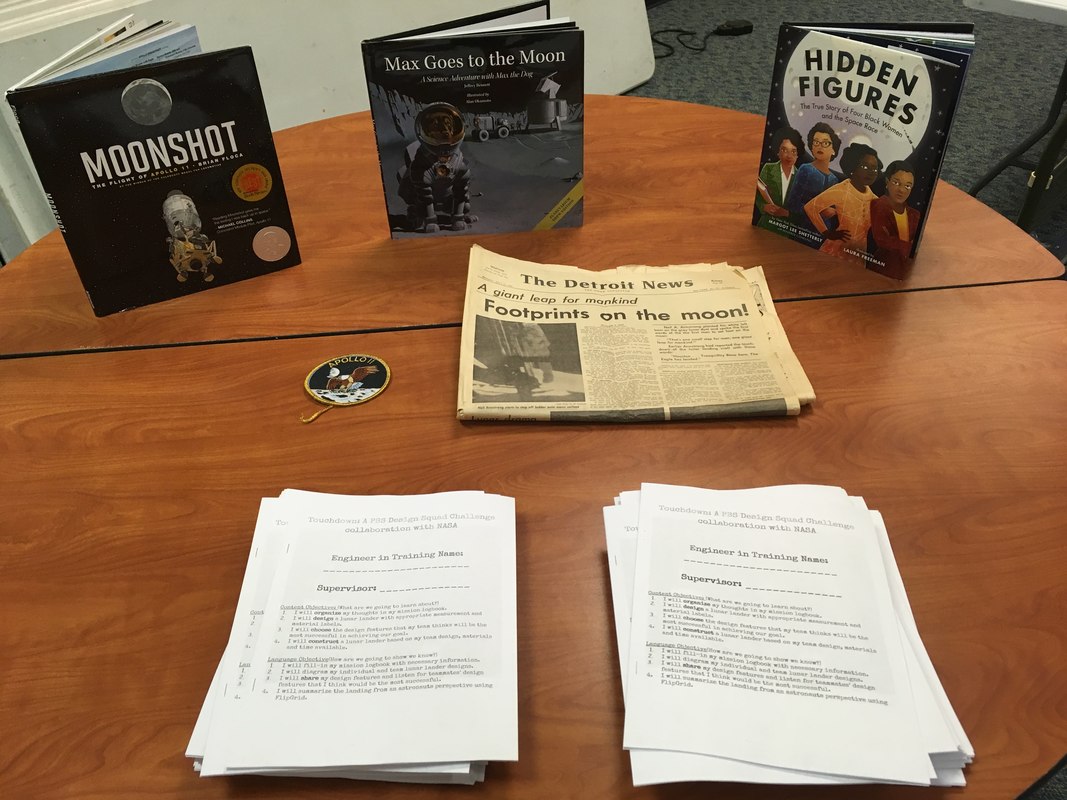 My awesome, former coworker, Steve taught me that kids are more excited when you set the scene. Students grabbed a logbook from the table when they walked in on day 1. The Lunar Lander lesson we modified was a NASA PBS Design Squad Challenge called Touchdown. It is one of six space-themed engineering design challenges in the On the Moon Activity Guide. Our modifications included putting the activity in the SLED structure, utilizing the LAUNCH Cycle (Design Thinking Framework) and Innovator's Compass. Exploring Beyond (2:36) - NASA Johnson This is a great video to get kiddos hooked. I saw it for the first time at a Space Center U Teacher Professional Development at Space Center Houston last summer. SLED STructure1) Design brief - Create a short story that gives meaning, purpose and connection to the activity. Students read a couple paragraphs to determine background information. 2) Identification - Using the design brief, students identify the following & record it.
4) Team Design - All teammates share individual designs and provide ONLY positive feedback. Best way to do this is to have a time limit (1 min) and review expectations for this process.
6) Test - Each team tests their design. *Determine how design will be tested BEFORE testing. 7) Communication - Share results
8) Improve and redesign Check out the Kiddos in ActionAssessment OptionsThis whole design challenge process is a performance assessment. A) Formative Assessment happens throughout this process with the logbook. - Observing student designs and asking them to explain the different features and why they chose them. - Listening in on team design brainstorms. It's a great way to evaluate team dynamic, group member's collaboration and students' abilities to persuade, defend and support their ideas. B) Summative Assessment - Checkpoints - Team Design Data - Did the design meet the requirements, constraints and solve the problem? - Science content -> How is the student able to explain? - Overall Evaluation Rubric - Redesign -> How did they makes changes to improve their design? Instead of using a notebook, we used the SLED structure to create a logbook for students to fill in. Each day we had mission checkpoints. After testing, students also answered journal entry questions to reflect on the process. Students recorded a FlipGrid video to describe their lunar landing from the astronaut's perspective. **I will be adding our logbook to my TPT store. Tech Tool: FlipgridThis awesome tech tool was also introduced to me at Space Center Houston last summer. It is FREE for educators! At first I wasn't sure how I would use it with my kiddos, but it's a great tool for your toolbox. It gives students another way to respond. You create a grid, give students the code and they can record their own video response to questions or prompts that you ask. Like many new tools, especially technology, I would highly recommend reviewing expectations, appropriate responses and commenting, etc. I tell my students that technology is a privilege and they need to use it correctly as an educational tool. *Note:It does requires a device with a camera to use. Settings/Options - Moderator - Allows you to view student videos BEFORE they are added to the grid. - Design - Allows students to add stickers - Reply capabilities - View, rate, comment and/or record a reply post - Rubric and evaluate them. - The free version allows a maximum of 90 second record time. Students love talking with peers, sharing their individual thoughts and ideas, responding to others and making videos, so why not allow them to harness this excitement educationally? I hope that you're able to use some, if not all, of this in your classroom! I've been very happily busy co-designing and teaching projects that I'm excited about. Therefore, I am behind on updating my TPT store with resources. It's a summer project, if not before.
Peace, love and space exploration, -CAPCOM Conrad |
AuthorApollo 13 fan. Educator. Lifelong Learner. Third generation Boilermaker. Space Exploration Enthusiast. Collaborator. 
Click Subscribe to stay updated!Archives
July 2022
Categories
All
|

 RSS Feed
